- Make the Bamboo tablet and HP stylus work together in some way.
- Buy a new tablet and get rid of all this crap, making a hole in my wallet.
- Gut this laptop and put together a homemade digitizer tablet.
After a quick assessment, option 1 proved bothersome: the HP stylus has a small PCB inside with a pair of adjustale trimpots. This is a perfectly serviceable stylus and I'll hate to render it unusable tweaking things I don't even know. And option 2 isn't interesting, right? so...
Let's go for that 3rd option!
Identifyng digitizer type
The first thing to know is what we're going to work with. Googling a bit I found there's 2 types of Wacom internal digitizers: serial (older models) and USB. The serial type comes with some Thinkpad X200Ts and Fujistu Lifebooks, it's more difficult to work with but not impossible. The latter is obviousy the preferred choice.
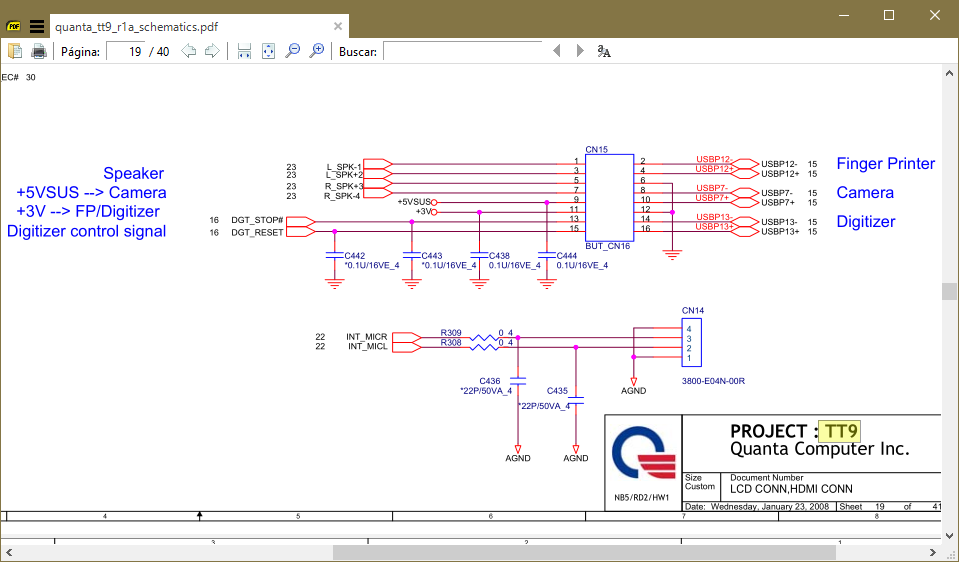
Perfect! This confirms the digitizer is indeed USB. I'm concerned about those DGT_STOP# and DGT_RESET lines... but for now I will ignore them, my goal is to wire this PCB to a USB cable and see if it's recognized by Windows. From the diagram we can see two things:
- Physical wiring needs to be followed to determine correct USB lines.
- Digitizer is powered by 3V, not 5V (nor 3.3V even) which is the norm.
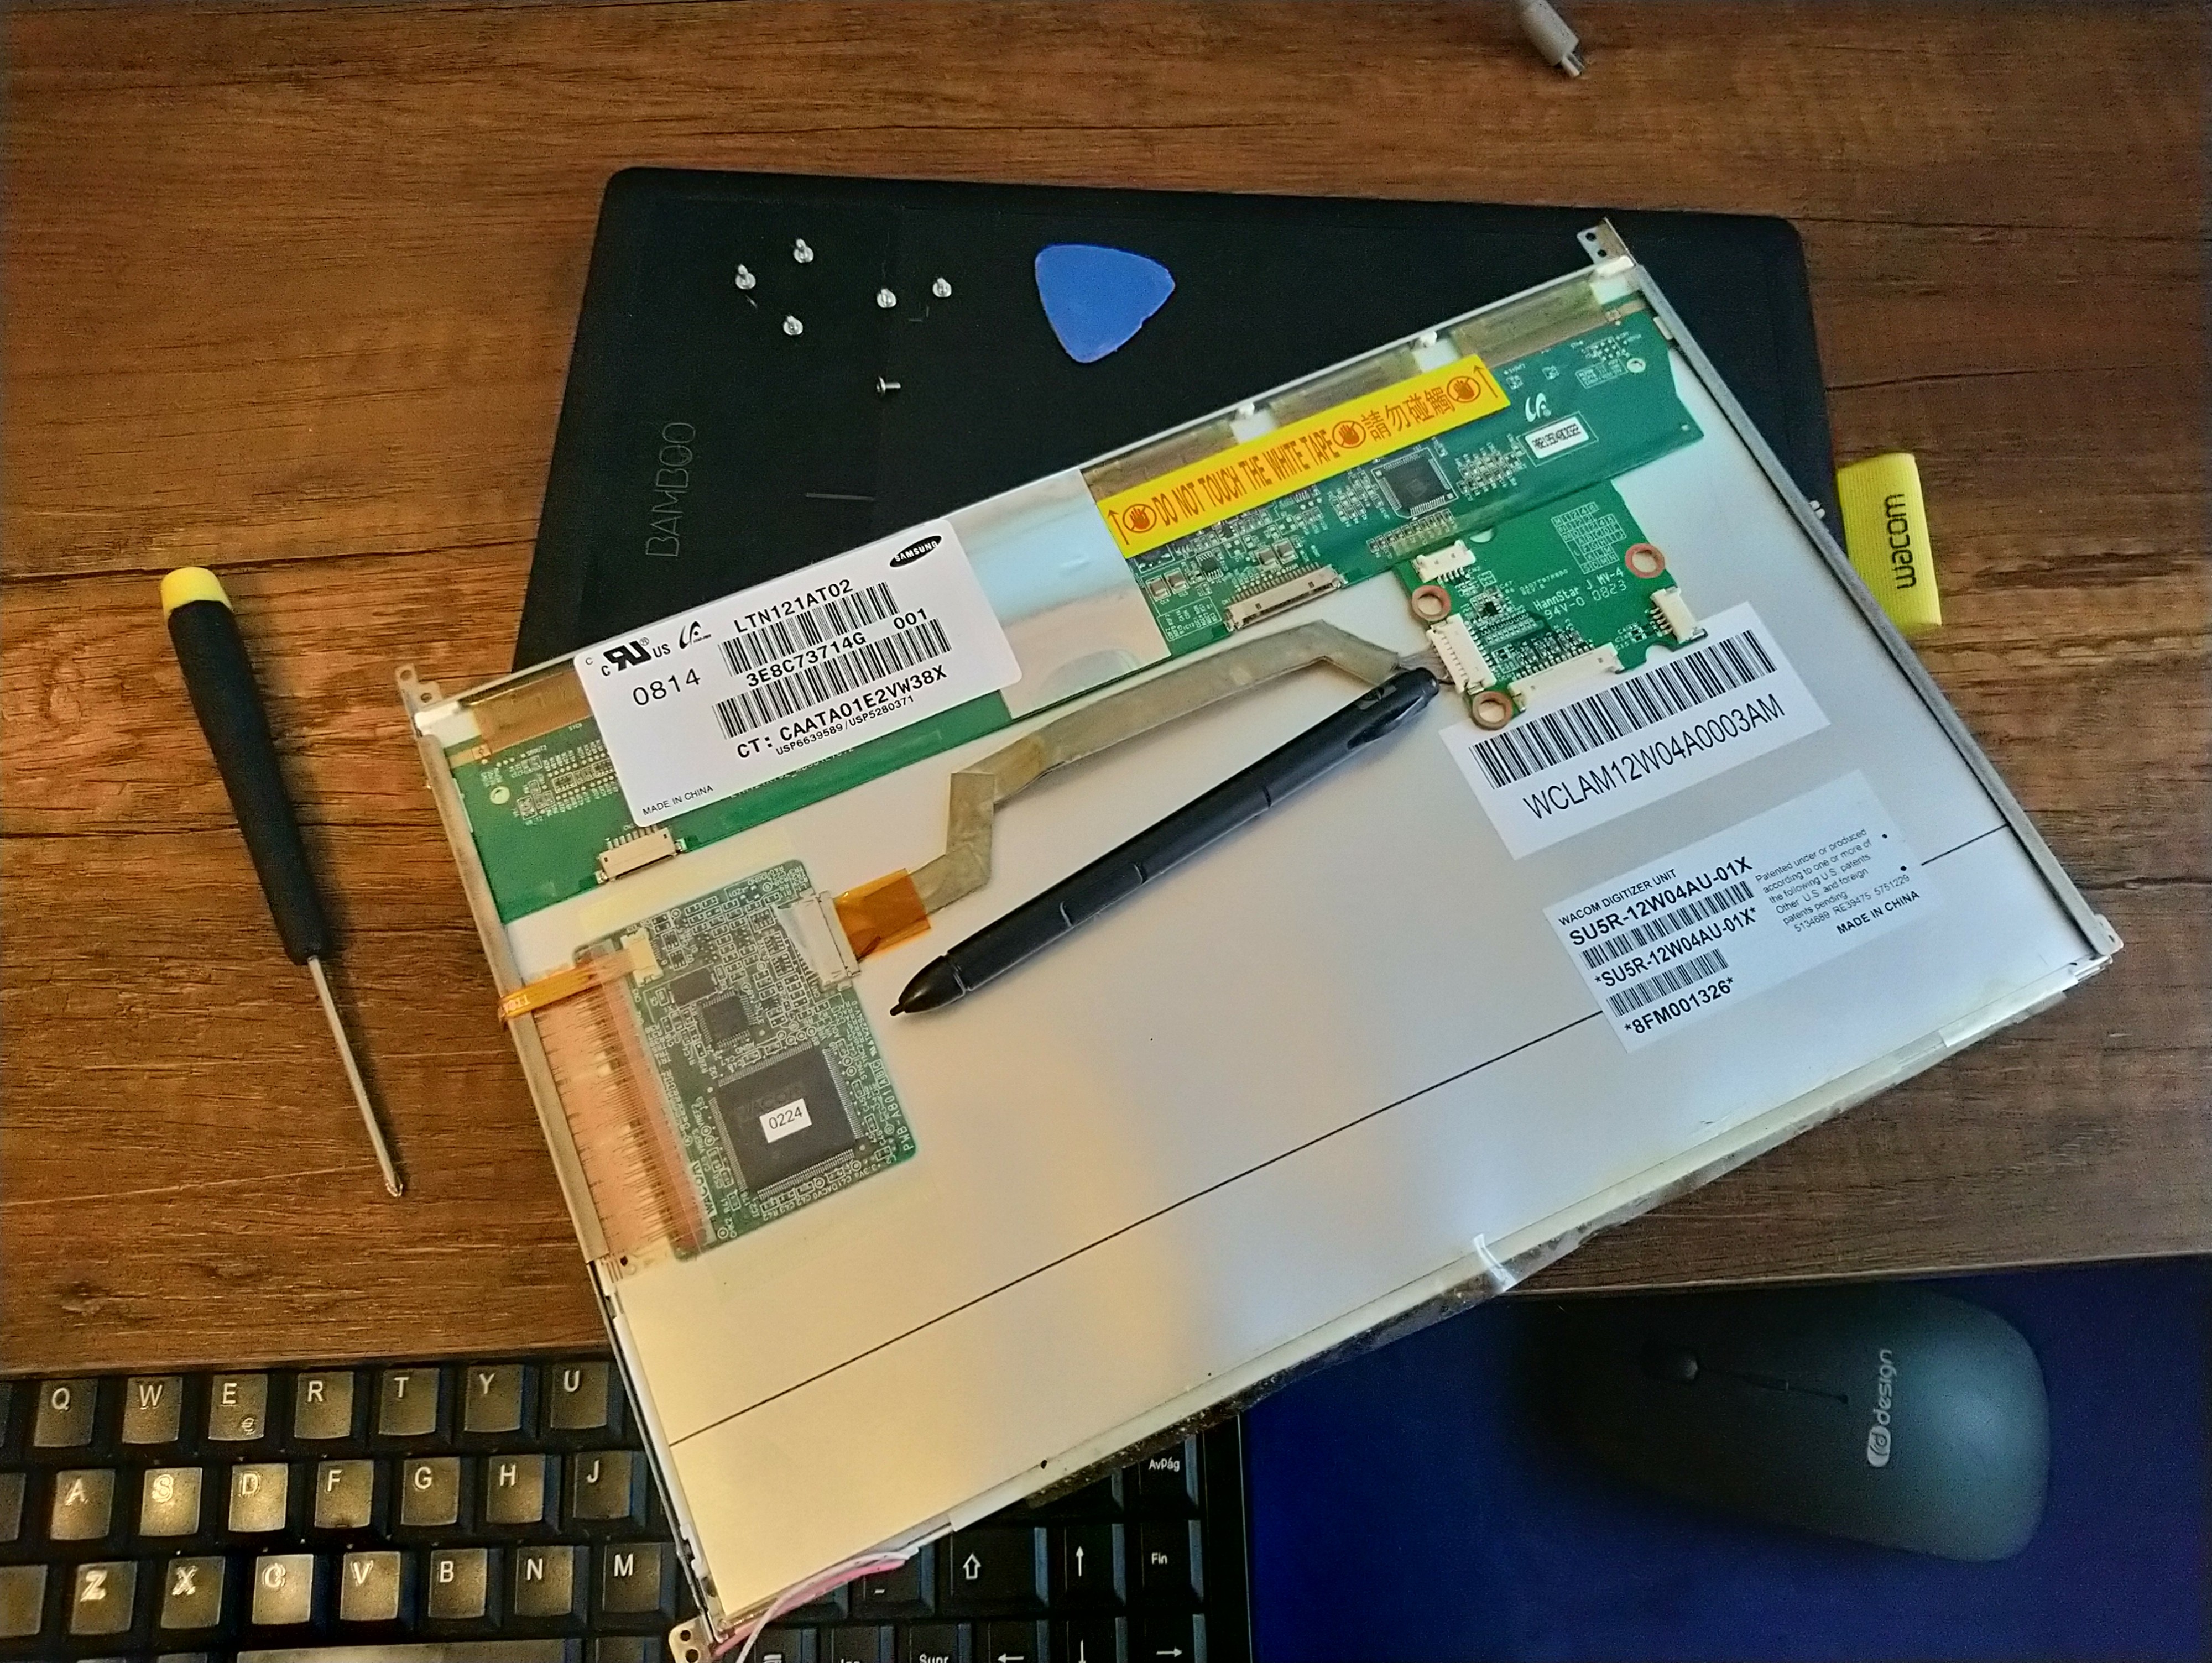
Stripping the display from the frame is an easy job. Following PCB traces for data, not so much... but I have'em identified and all I need is stripping a USB donor cable for tapping on those traces, and a good solder-iron tip - which currently I do not have, sigh...
** Sept 08, 2020 - Due to unforeseen circumstances, I've left this project on hold way longer than intended... But now I'm ready to tackle it again. Expect part 2 in the coming days!! :)